Your First Quote
We have populated your account with an initial selection of materials, consumables, pricing models and blueprints so you can begin quoting straight away, and you can continue to add your own materials and processes as time goes on. This guide walks through building your first quote: creating the quote, selecting a customer, applying a blueprint, reviewing the price and publishing it.
You need a Creator, Approver or Admin role to build the quote. If approval is turned on, an Approver or Admin publishes it. Team shows who has which role.
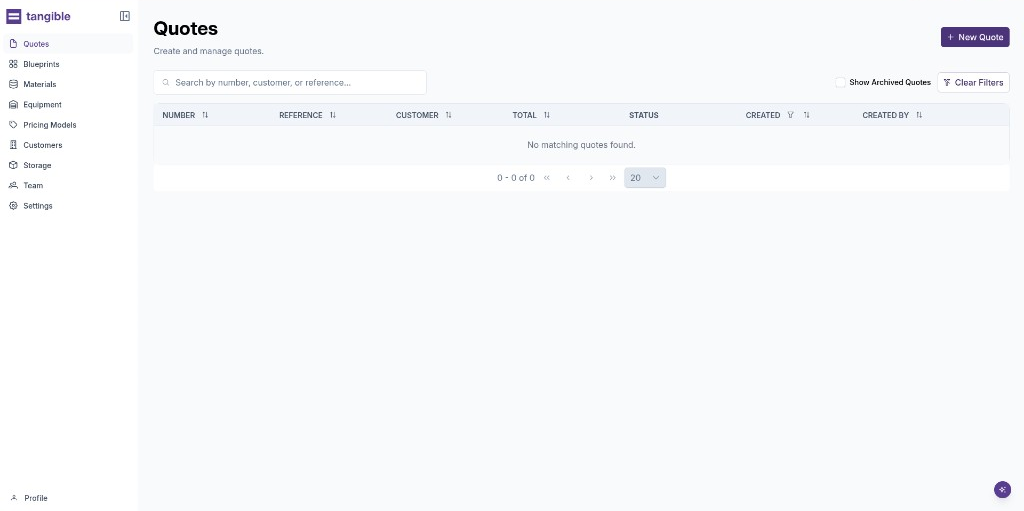
Open a new quote
- Open Quotes.
- Choose New Quote.
Tangible opens a draft and numbers it with your quote code, for example AC123.
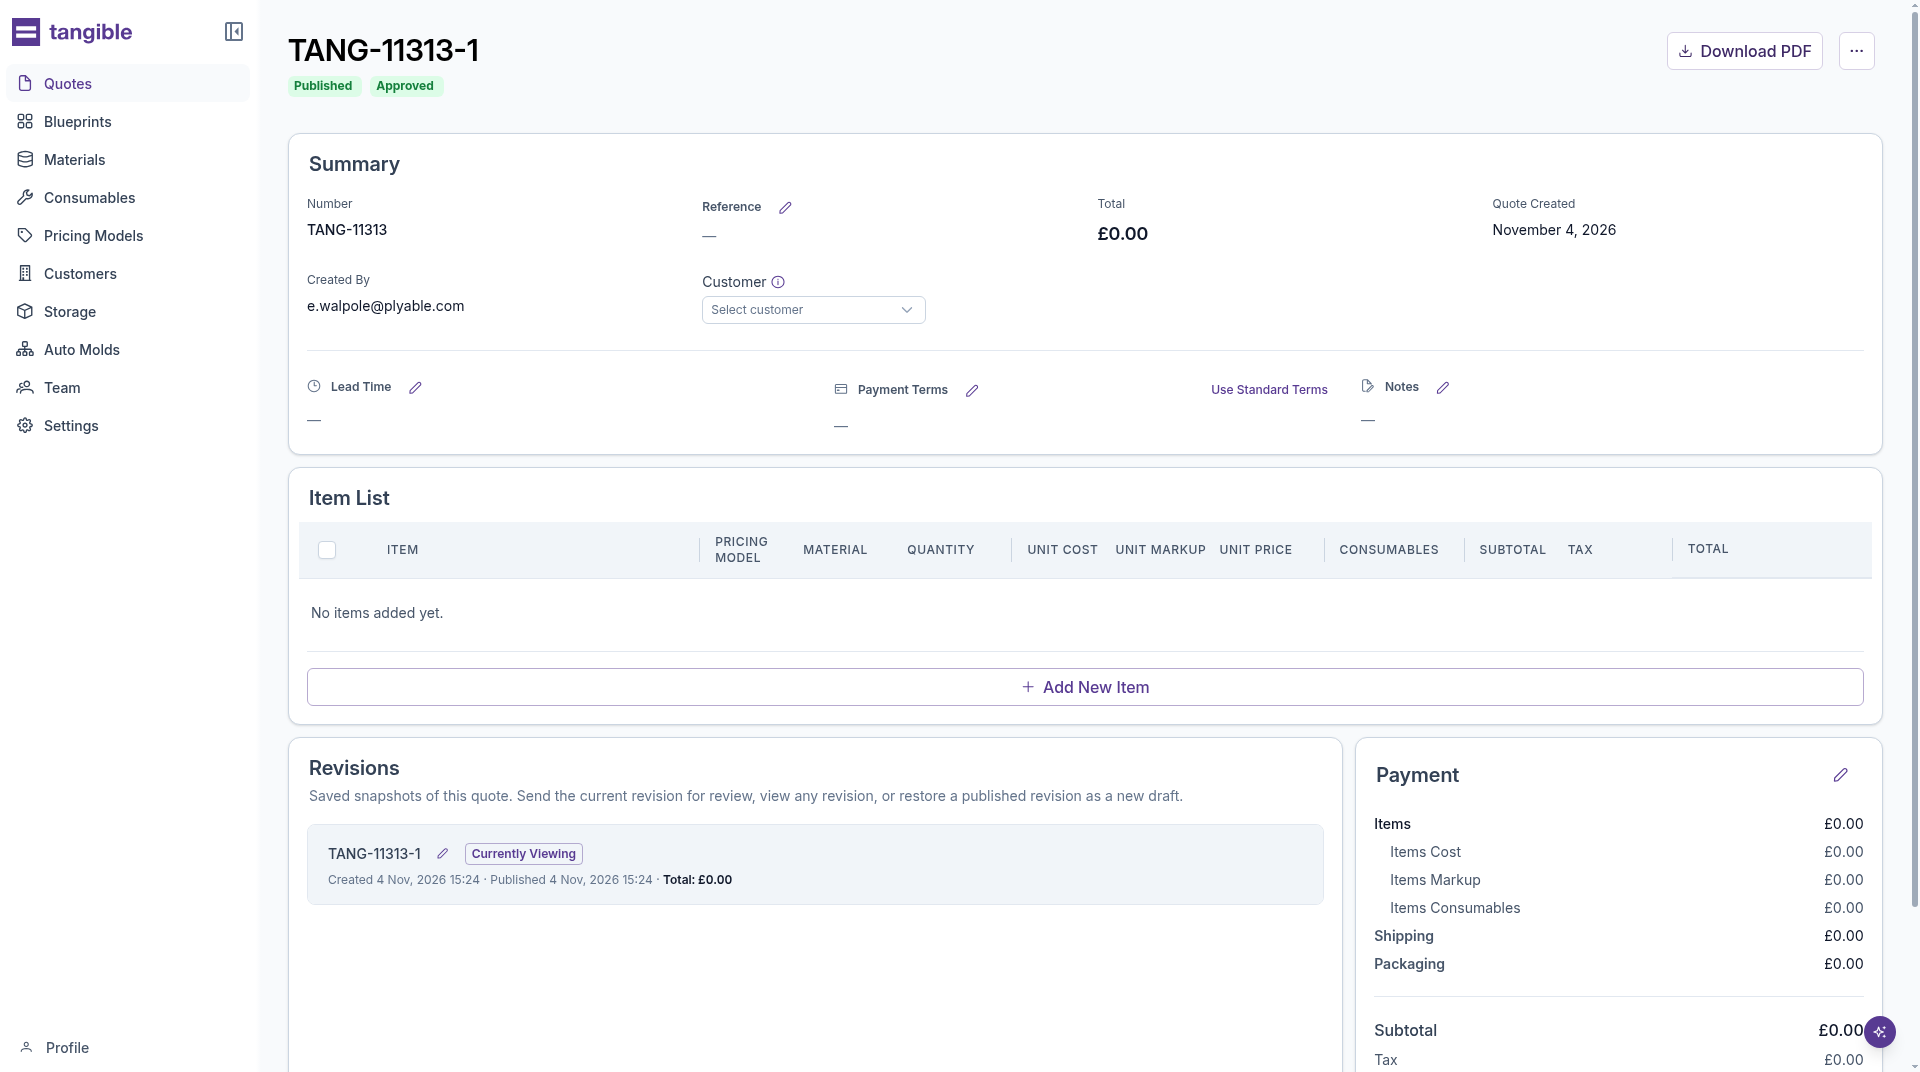
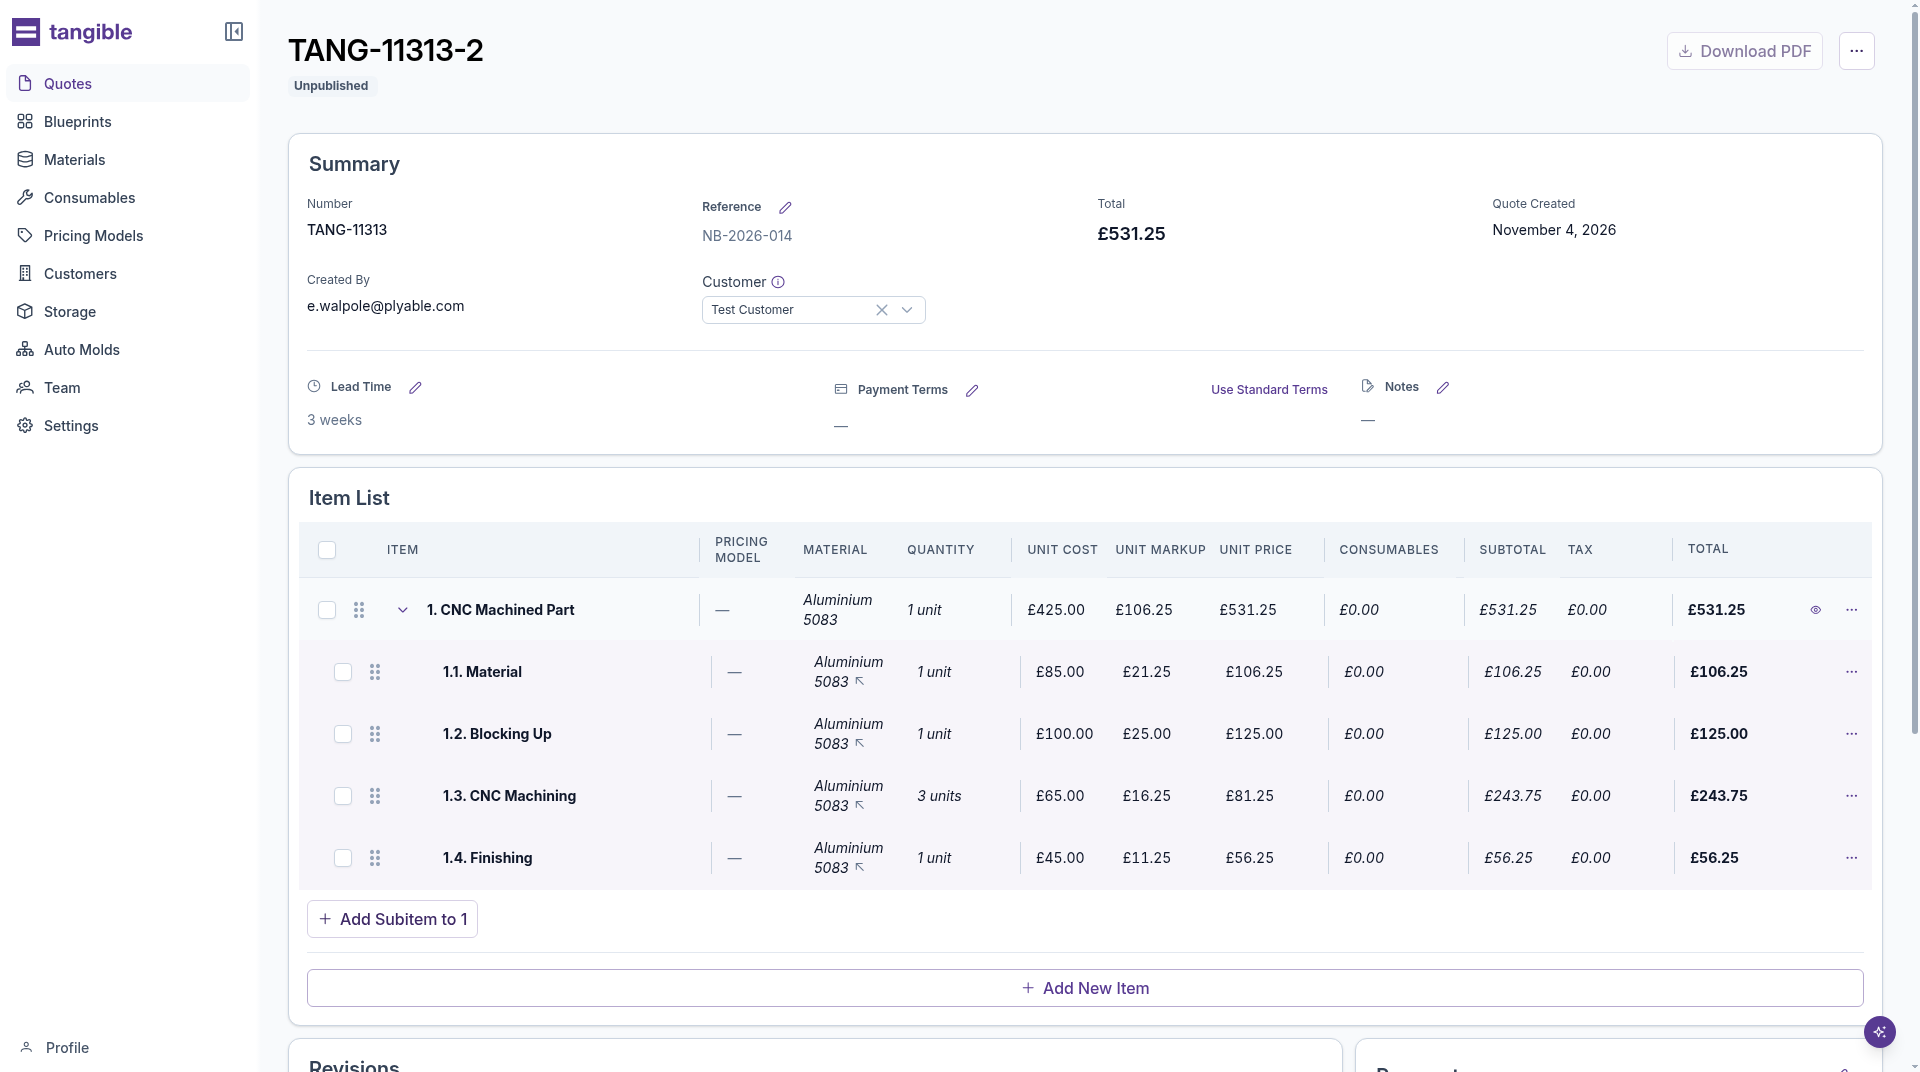
The quote page has four areas:
- Summary: the customer, reference, lead time and payment terms.
- Item List: where you add and price the line items.
- Payment: the totals.
- Revisions: where you publish the draft, or send it for review.
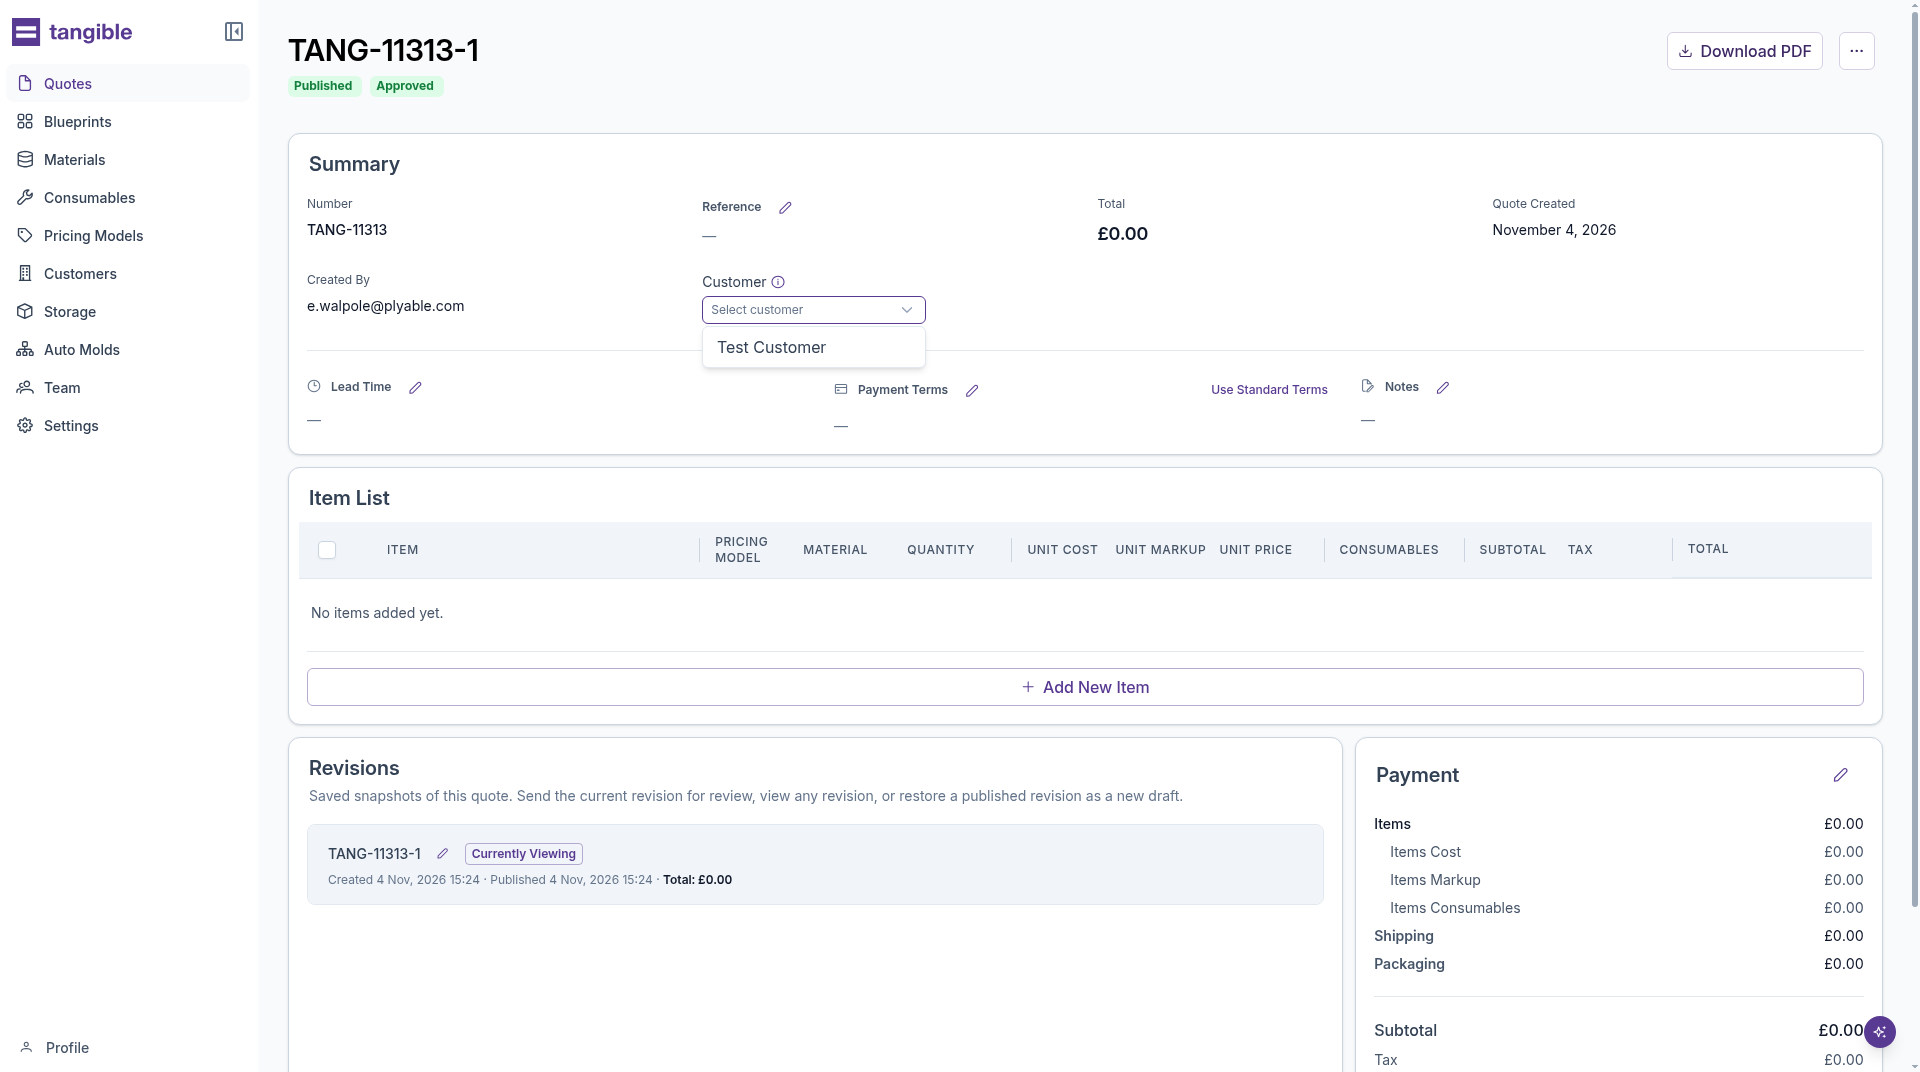
Set the customer and terms
- In Summary, open Customer and select the company.
- Set a Reference with the pencil icon, if you use one, such as the customer's order number.
- Set Lead Time with its pencil icon.
- For Payment Terms, choose Use Standard Terms when your organisation has standard terms, or edit the terms for this quote.
The customer has to exist before you can select them. Add a missing company from Customers.
Add a blueprint
A blueprint copies a ready-made set of line items onto the quote, with quantities, materials and pricing models already chosen.
- In Item List, choose Add New Item.
- Choose Add Blueprint, select a blueprint and confirm. Its line items are copied into the editor.
- Check the name, quantity, material, pricing model, markup and tax code. Change anything that does not fit this job.
- Choose Add to Quote.
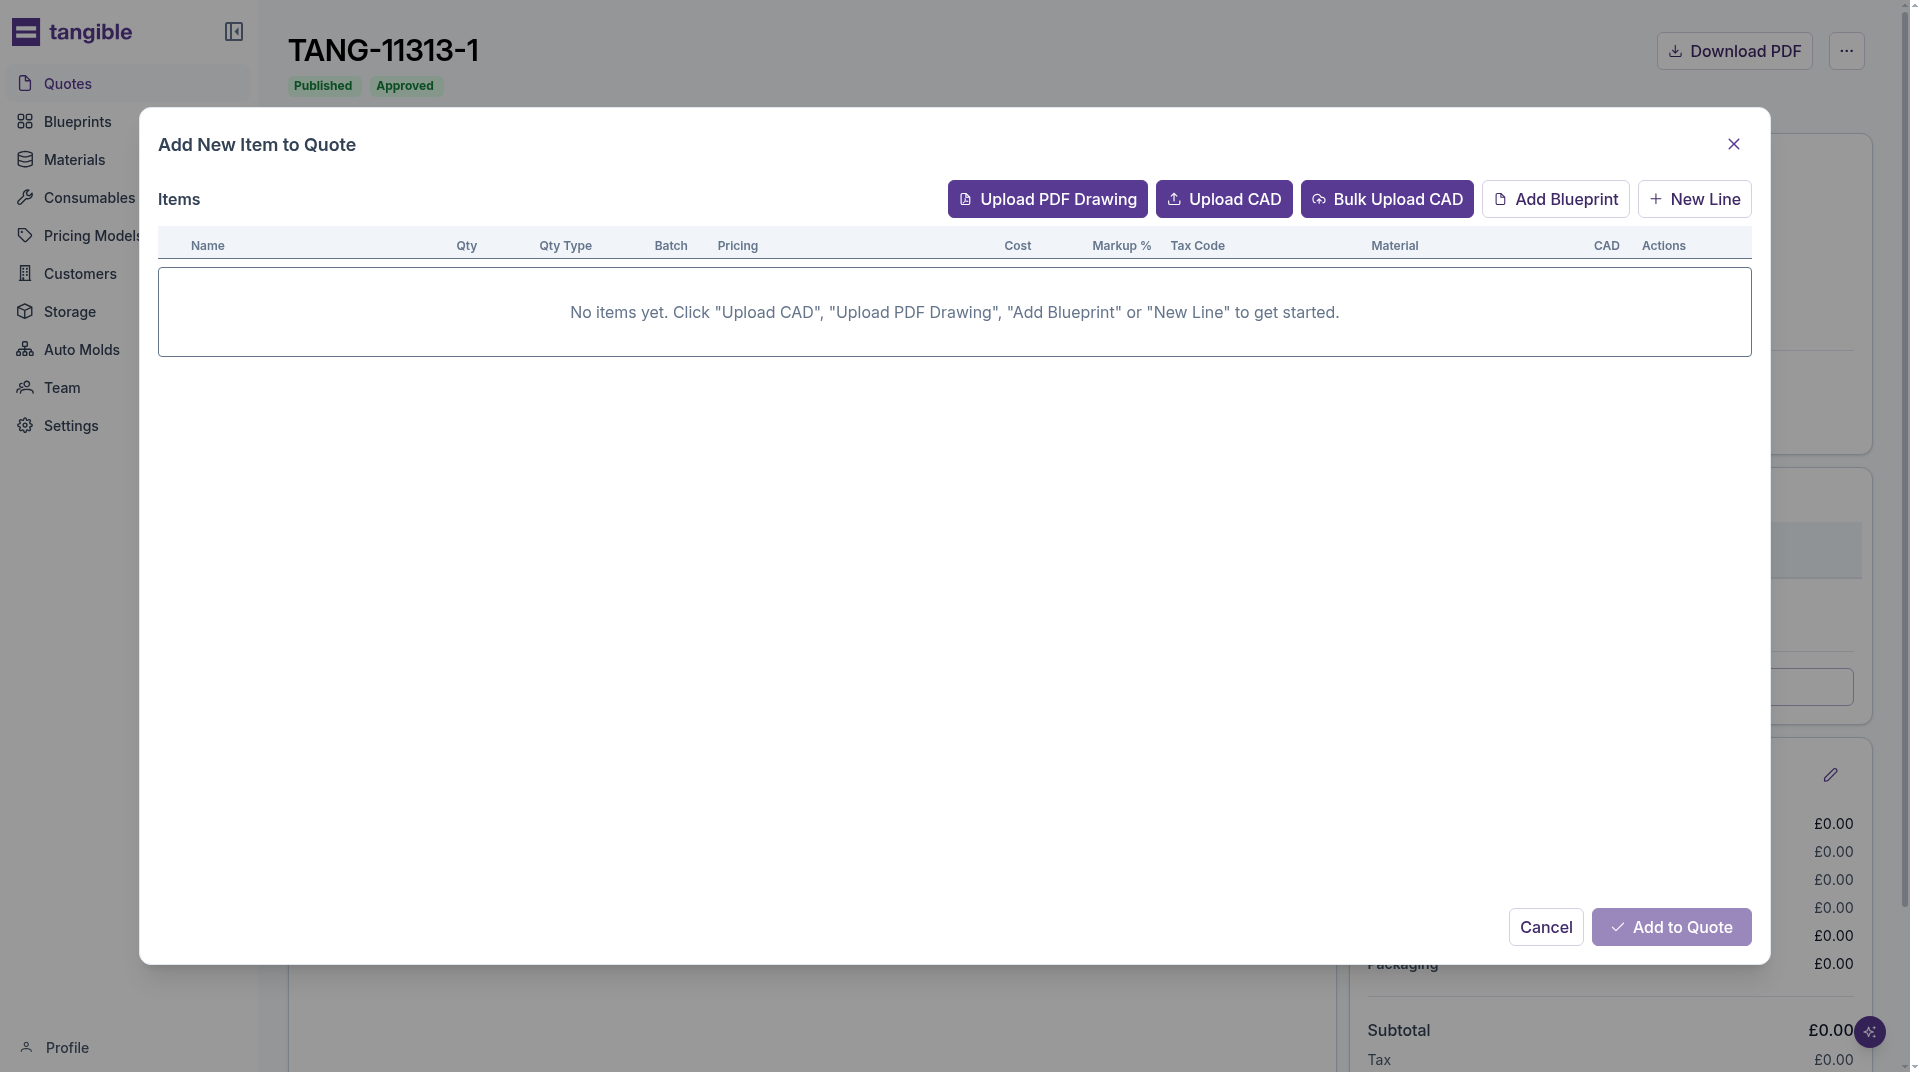
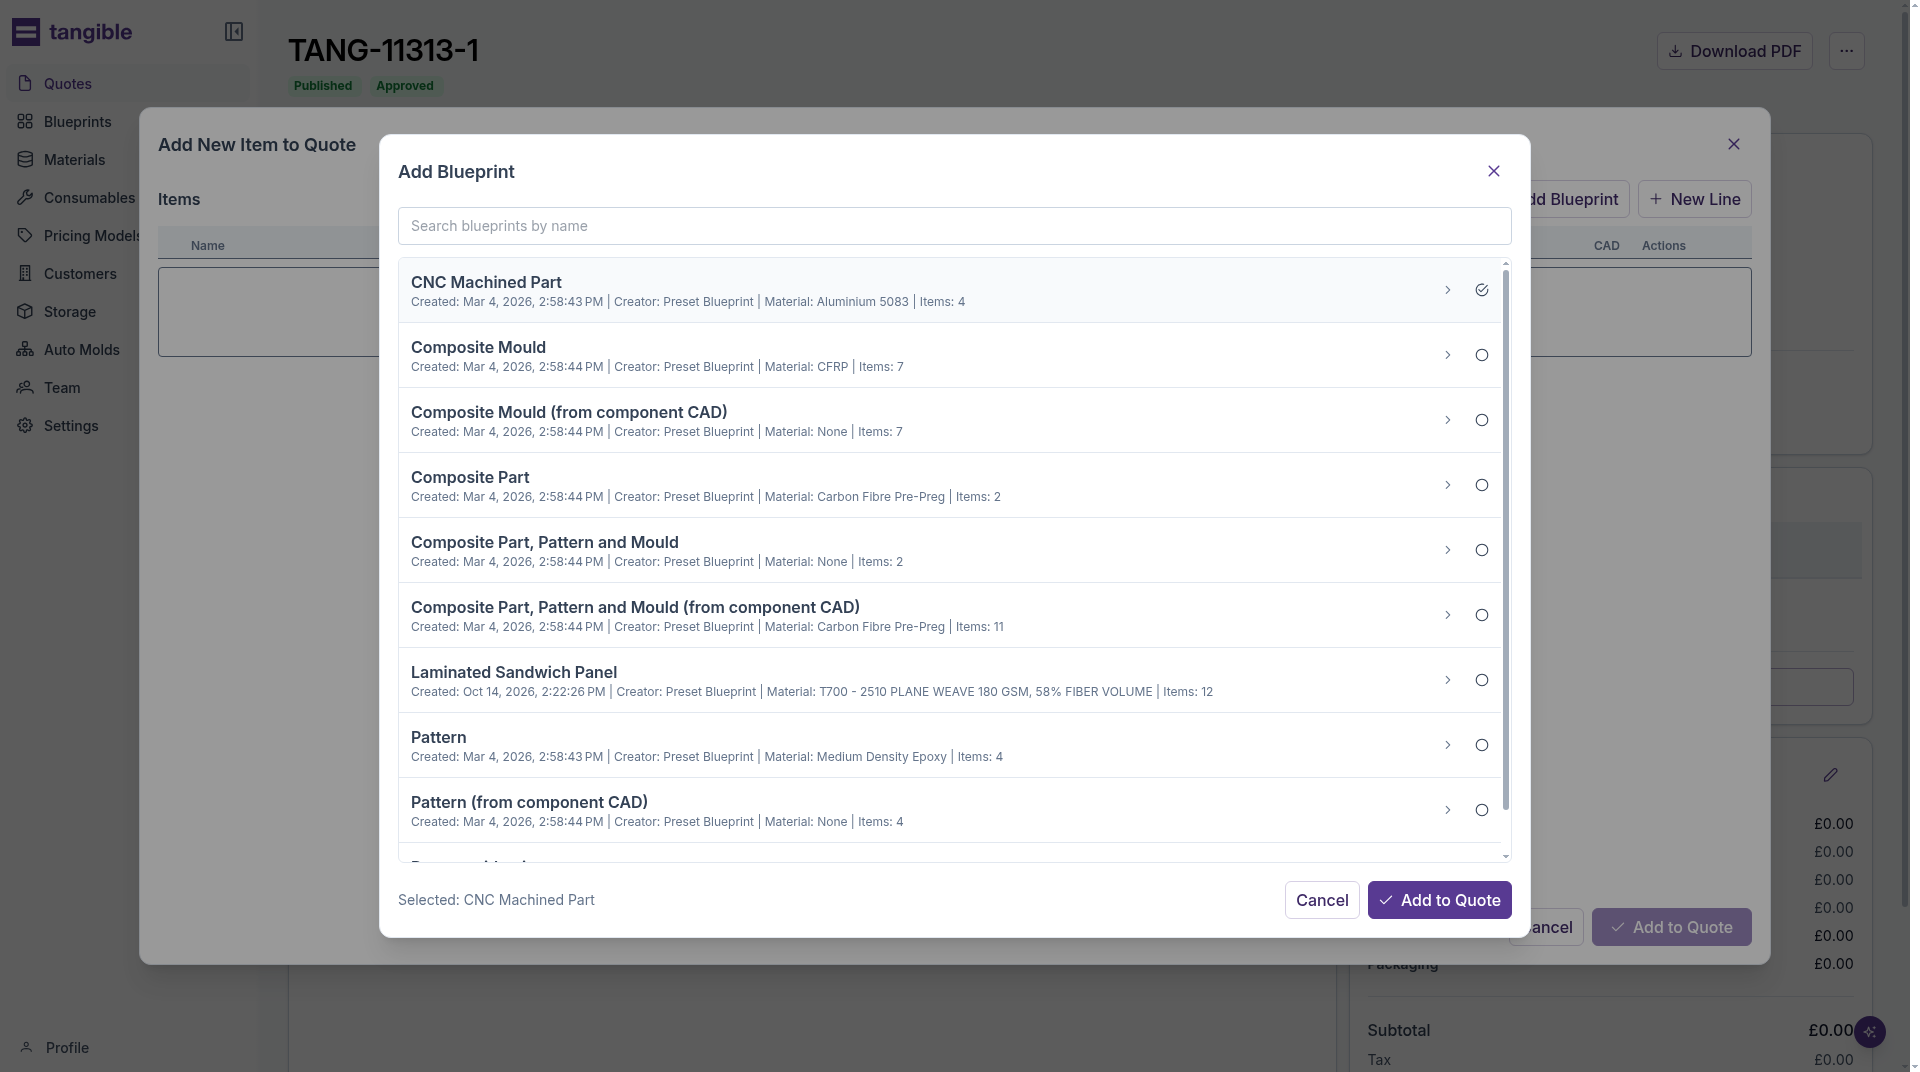
Update each item's quantity, material and price in that editor before you choose Add to Quote. The Item List then shows those items. A parent item's price is the total of its child items. Line items covers nesting, batch pricing and editing several items at once.
To quote from a file instead of a blueprint, use Upload PDF Drawing or Upload CAD in the same window. CAD and Drawings covers those paths.
Check the price
The Payment card updates as you add items. Items is the price of the line items. Subtotal, Tax and Total sit underneath, with shipping and packaging when they apply.
Publish the quote
Publishing fixes this revision as the quote you issued. The draft is marked Unpublished until you do.
- In Revisions, on the current draft, choose Publish.
- Choose Download PDF for that revision.
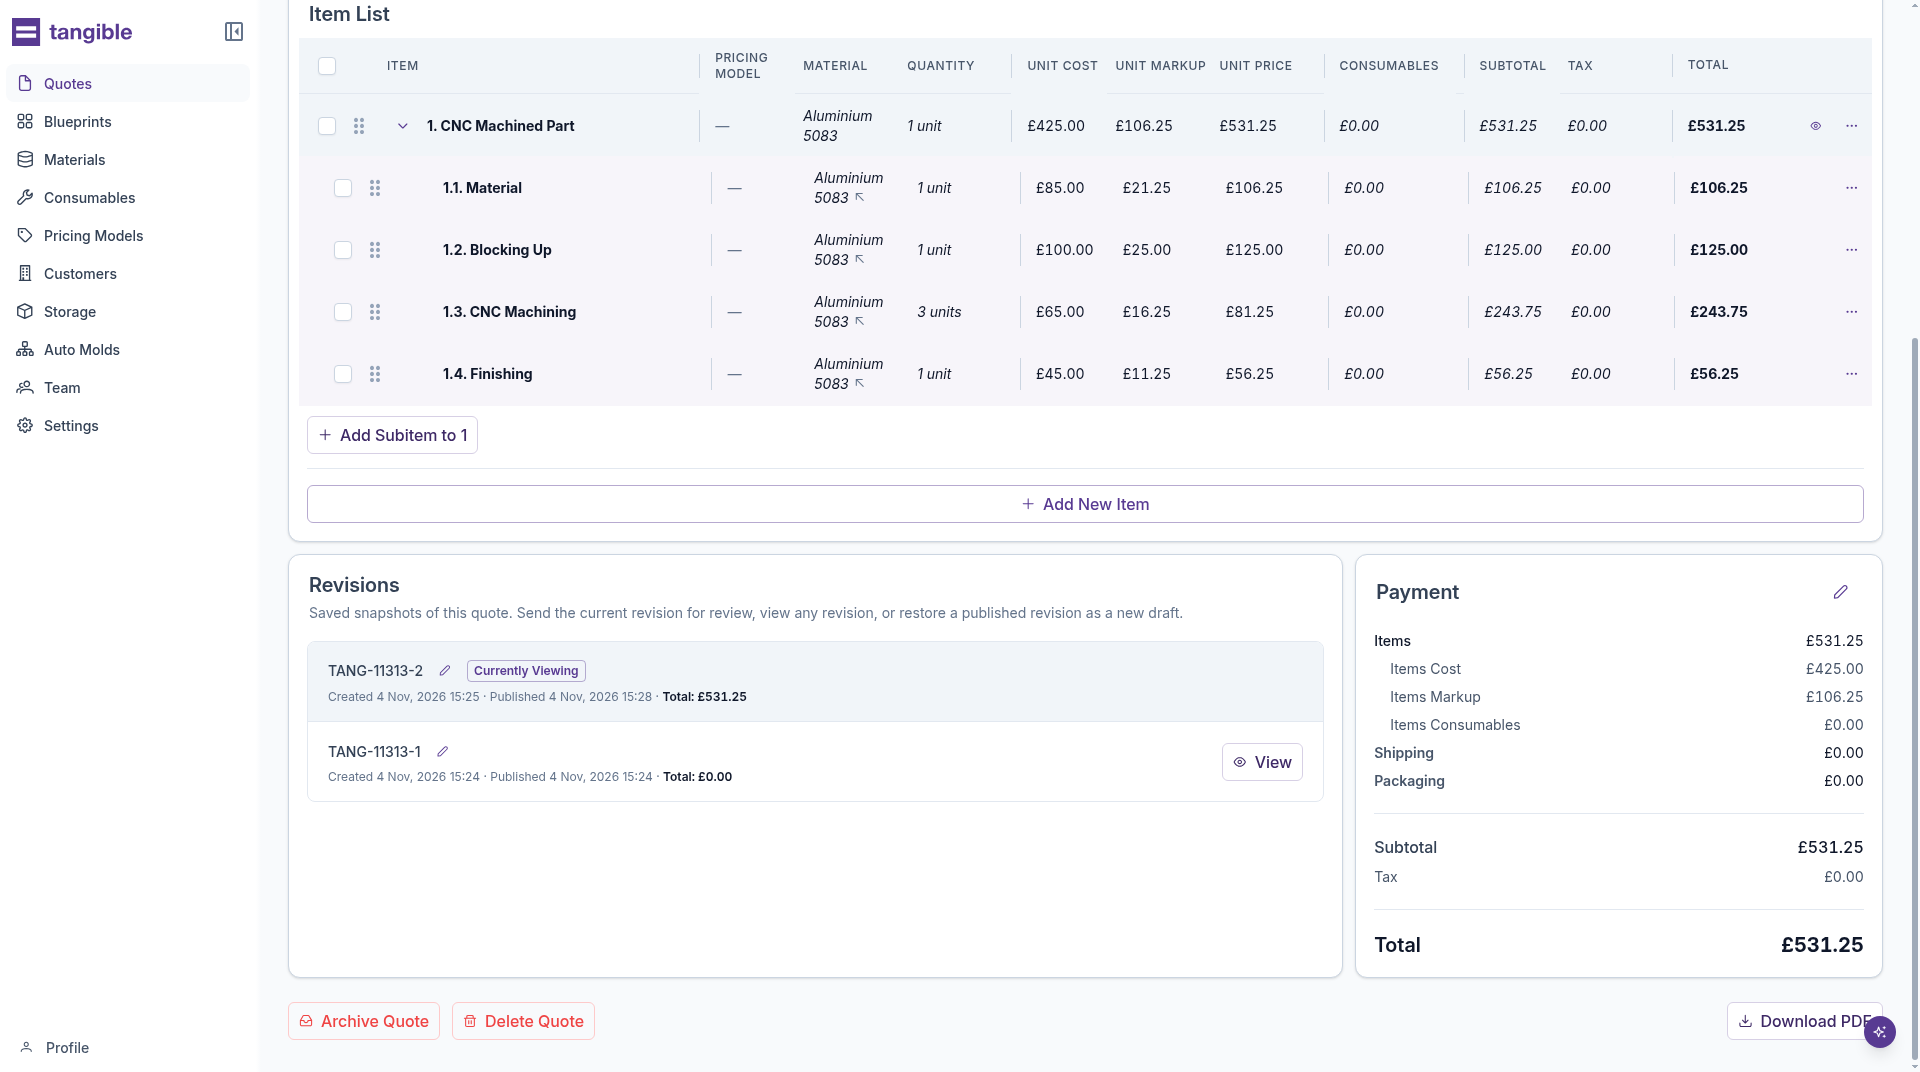
When approval is turned on, Publish is replaced by Request review. An approver chooses Approve, which publishes the revision, and Download PDF is available after that. Revisions covers restoring an older revision and the review steps.
Quote From CAD and Quote From Drawing can extract the part geometry and details for you and build a quote out. See CAD and Drawings for how both work.
See also: Introduction to Quotes; How quote line items are structured